So, you want to make sure your beloved RV stays in top shape and keeps you dry during your adventures? Well, sealing your RV roof is the way to go! Don’t worry, I’ve got you covered with this upbeat and relaxed step-by-step guide on how to seal an RV roof like a pro. Get ready to say goodbye to leaks and hello to worry-free travels!
Table of Contents
Choosing the Perfect Sealant
When it comes to sealants, not all are created equal, my friend. You’ll want to get your hands on an elastomeric sealant specially designed for metal RV roofs. These babies offer the flexibility and durability you need to keep your roof sealed tight. Trust me, using the right RV roof sealant is half the battle won!
Prepping Your Roof
Before diving into the sealing process, let’s prepare your roof for action. Grab a mild detergent or RV roof cleaner, a soft brush or sponge, and gently scrub your roof. We want to get rid of any dirt, debris, or old sealant that might hinder our sealing efforts. Rinse it off with some clean water and let it dry completely. We’re almost there!
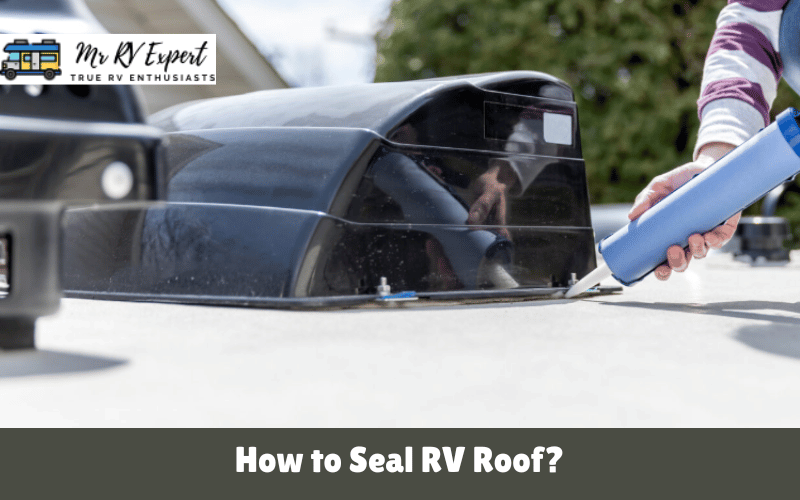
Let’s Get Sealing!
Now comes the fun part—time to seal that roof! Take your trusty paintbrush and apply the sealant to the areas needing sealing. You can choose to cover the entire roof or focus on specific spots like seams, vents, and joints. Remember, we’re aiming for an even and smooth application here. Take your time, enjoy the process, and make sure every nook and cranny gets some love.
Drying and Curing Time
Alright, we’ve done our part. Now it’s time to let the sealant work its magic. Follow the manufacturer’s instructions for drying and curing times, as they can vary depending on the product and weather conditions. Keep your fingers crossed for some sunny days, as the sealant should dry within a day or two. Resist the urge to test it out with a water hose—let it cure undisturbed.
Top Tips for Maintaining a Sealed RV Roof
When it comes to maintaining a sealed RV roof, there are several important tips that you should keep in mind. These tips will help ensure that your roof remains in good condition and effectively protects your recreational vehicle. So, let’s dive into the top tips for maintaining a sealed RV roof:
Regularly inspect your roof for any signs of damage, cracks, or wear
Keeping a close eye on your RV roof is crucial to identify potential issues before they worsen. Check for signs of water damage, such as discoloration or soft spots, and inspect the caulking and seals around vents, skylights, and other roof penetrations. You can address problems promptly and prevent further damage by identifying problems early on.
Keep your roof clean by removing dirt, debris, and potential contaminants.
Regular cleaning is essential to prevent the buildup of dirt, grime, and pollutants on your RV roof. Use a mild cleanser or specialized roof cleaner to remove any stains or residue. Be cautious when using a pressure washer, as excessive pressure can damage the roof’s surface. Additionally, consider using a soft brush or sponge to scrub the roof and remove any stubborn dirt gently.
Consider resealing your roof every few years.
Over time, the sealant on your RV roof may deteriorate due to exposure to the elements. To maintain an effective seal, it’s advisable to reseal your roof periodically. Consult the manufacturer’s guidelines for the recommended frequency of resealing and choose a high-quality sealant that is compatible with your RV roof material. Proper resealing will help prevent leaks and extend the lifespan of your roof.
Protect your RV roof from harsh weather conditions.
Extreme temperatures, UV radiation, and harsh weather can affect your RV roof. Parish your RV in shaded areas or use RV covers to shield the roof from direct sunlight. Remove snow buildup promptly in colder climates to prevent excess weight and potential damage. By minimizing exposure to harsh weather conditions, you can prolong the life of your sealed RV roof.
Maintain proper ventilation inside your RV
Adequate ventilation is essential for preventing excessive heat and moisture buildup, which can lead to roof damage and mold or mildew growth. Ensure that vents and fans are in good working condition, and consider using roof vent covers to allow for ventilation even during inclement weather. Proper airflow will help maintain a healthy environment and minimize the risk of roof-related issues.
Conclusion
And there you have it—a complete guide to sealing your RV roof like a pro! By following these steps, choosing the right sealant, and performing regular maintenance, you can enjoy worry-free travels and protect your RV from pesky leaks and water damage. Now, go out there and embark on your next adventure with confidence!
FAQs
How often should I seal my RV roof?
Resolving your RV roof every few years or per the manufacturer’s guidelines is recommended. However, look for any signs of damage and address them promptly.
How long does the sealant take to dry?
Drying times may vary, so check the manufacturer’s instructions for specifics. In most cases, the sealant should dry within a day or two. Patience is key!
Can I hit the road during the drying process?
Hold your horses, adventurer! Avoid exposing your freshly sealed roof to rain or excessive moisture while it’s drying. Let it cure undisturbed for the best results.