If you’re an avid RV user, you know how essential a working air conditioner is during those hot summer months. But what do you do when your RV’s air conditioner stops working? In many cases, a simple reset can do the trick. In this article, we’ll go over the step-by-step process of resetting your RV air conditioner, common issues to look out for, and tips for maintaining your air conditioner to prevent future problems.
Table of Contents
Understanding Your RV Air Conditioner
Before you can reset your RV air conditioner, it’s essential to understand a few things about it. RV air conditioners work differently from typical home air conditioners. Most RV air conditioners operate using two separate components: the evaporator coil and the condenser coil. These two coils work together to cool the air in your RV. The evaporator coil absorbs heat and moisture from the air inside your RV, while the condenser coil releases that heat and moisture outside. Additionally, RV air conditioners have a built-in thermostat that helps regulate the temperature.
It’s important to note that RV air conditioners require regular maintenance to function properly. This includes cleaning the air filters, checking the refrigerant levels, and inspecting the coils for any damage or wear and tear. Neglecting these maintenance tasks can lead to decreased efficiency and even system failure.
Types of RV Air Conditioners
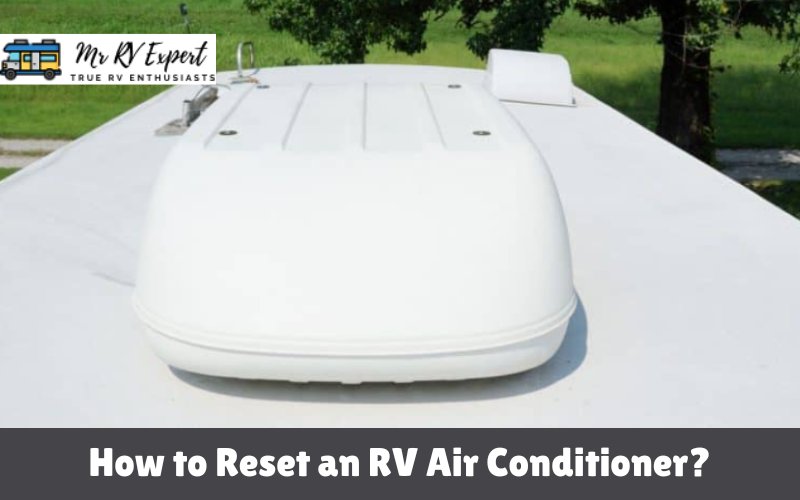
There are two types of RV air conditioners on the market: rooftop and portable air conditioners. Rooftop air conditioners are installed onto the roof of your RV and are more commonly used. They are typically more powerful and can cool larger areas. Portable air conditioners, on the other hand, are designed to be moved around the RV and are best suited for smaller RVs or for those who prefer a more flexible cooling option.
When choosing an RV air conditioner, it’s important to consider factors such as the size of your RV, the climate you’ll be travelling in, and your personal preferences. A rooftop air conditioner may be the best choice for those travelling in hot and humid climates or for those with larger RVs, while a portable air conditioner may be a better option for those who prefer a more versatile and flexible cooling solution.
Common Issues with RV Air Conditioners
While RV air conditioners are designed to be reliable, they can still experience issues. Some of the most common issues RV owners face include low refrigerant levels, faulty thermostats, and dirty air filters. Low refrigerant levels can cause the air conditioner to blow warm air or to not cool at all. Faulty thermostats can cause the air conditioner to turn on and off inconsistently, while dirty air filters can decrease the efficiency of the air conditioner and lead to poor air quality.
Before attempting to reset your air conditioner, it’s crucial to rule out any underlying issues that may be causing the problem. This may involve inspecting the air filters, checking the refrigerant levels, and ensuring that the thermostat is functioning properly. In some cases, it may be necessary to seek professional assistance to diagnose and repair the issue.
By understanding how your RV air conditioner works and taking steps to maintain it properly, you can ensure that it provides reliable and efficient cooling throughout your travels.
Preparing for the Reset Process
Resetting your RV air conditioner can be a straightforward process if you have the necessary tools and take appropriate safety measures. However, before you begin the reset process, it’s essential to gather all the necessary tools and materials.
Gather Necessary Tools and Materials
For an RV air conditioner reset, you’ll need a few basic tools, including a multi-meter, a screwdriver, and gloves. The multi-meter will help you test the voltage and ensure that the power supply is working correctly. The screwdriver will be used to remove the air conditioner cover and access the internal components. Gloves will protect your hands from any sharp edges or electrical components.
In addition to the tools, you may also need to have a can of compressed air on hand to clean the air filters. Over time, air filters can become clogged with dirt and debris, reducing the efficiency of your air conditioner. Cleaning the air filters can help improve the airflow and reduce the strain on your air conditioner.
Ensure Safety Precautions
Working with electricity can be dangerous, so it’s essential to take appropriate safety precautions before attempting to reset your air conditioner. Make sure the power to your RV is turned off before you begin the reset process. You should also wear gloves and avoid touching any electrical components directly.
It’s also a good idea to have a partner with you when you’re working on the air conditioner. They can help hold the cover in place while you work on the internal components. Additionally, if you encounter any problems or are unsure about what you’re doing, it’s best to contact a professional to avoid any potential safety hazards.
By following these simple steps, you can prepare for the air conditioner reset process and ensure that you’re taking all necessary safety measures. With a little bit of preparation and caution, you can reset your RV air conditioner and enjoy cool, comfortable air on your next adventure.
Step-by-Step Guide to Resetting Your RV Air Conditioner
Now that you’ve gathered the necessary tools and materials and taken appropriate safety measures, it’s time to reset your RV air conditioner. Follow these simple steps:
Step 1: Turn Off the Power
The first step in resetting your RV air conditioner is to turn off the power. This will help prevent any electrical shock or damage to your air conditioner. Make sure to turn off all power sources, including your RV’s main electrical supply.
It’s important to take this step seriously as it can be dangerous to work with electrical components without first turning off the power. In addition to the risk of electrical shock, you could also damage your air conditioner if you don’t turn off the power.
Step 2: Locate the Reset Button
Next, locate the reset button on your air conditioner. The reset button is typically located on the control panel of your air conditioner, and it may be labeled as a “reset” or “test” button.
If you’re having trouble locating the reset button, consult your air conditioner’s manual or contact the manufacturer for assistance.
Step 3: Press and Hold the Reset Button
Once you’ve located the reset button, press and hold it for at least three seconds. This will reset your air conditioner’s power supply and clear any error codes that may be causing the issue.
It’s important to hold the reset button for the full three seconds to ensure that the reset is successful. If you release the button too soon, the reset may not work properly.
Step 4: Restore Power and Test the Air Conditioner
After resetting your air conditioner, restore power to your RV and turn on the air conditioner. Test the air conditioner to see if it’s working correctly. If it’s working, great! If not, you may need to call a professional to diagnose and fix the problem.
If you continue to experience issues with your air conditioner, it’s important to address them promptly. Ignoring air conditioning problems can lead to more serious issues down the line, including costly repairs or even the need for a full replacement.
Regular maintenance and cleaning can also help prevent air conditioning issues. Make sure to clean your air conditioner’s filters regularly and have it serviced by a professional at least once a year.
By following these steps and taking proper care of your RV air conditioner, you can ensure that it will continue to provide you with cool, comfortable air for many camping trips to come.
Troubleshooting After Resetting
Resetting your air conditioner can be a quick and easy fix for common issues, but what happens if your air conditioner still isn’t working correctly? Here are some additional troubleshooting tips to help you get your AC up and running again.
Check Your Air Filter
A dirty air filter can cause your air conditioner to work less efficiently, or even stop working altogether. Check your air filter and replace it if it’s dirty. This is a simple fix that can make a big difference in your AC’s performance.
Inspect Your Ductwork
Leaky ductwork can cause your air conditioner to blow warm air or not work at all. Check your ductwork for any leaks or damage. If you find any issues, contact a professional to have them repaired.
Inspect Your Thermostat
If your air conditioner still isn’t working correctly, it’s possible that your thermostat is malfunctioning. Check your thermostat’s batteries and settings to make sure everything is working correctly. If you’re still having issues, consider replacing your thermostat or contacting a professional for assistance.
When to Call a Professional
If you’re unable to diagnose the problem yourself, it’s best to call a professional. A certified HVAC technician will be able to diagnose and fix the issue quickly and safely. They can also provide regular maintenance to keep your air conditioner running smoothly and efficiently.
Remember, regular maintenance is key to keeping your air conditioner working at its best. Schedule annual maintenance with a professional to ensure your AC is ready to keep you cool all summer long.
Maintaining Your RV Air Conditioner
Regular maintenance is essential for keeping your RV air conditioner working correctly. Not only will it help you avoid costly repairs, but it will also ensure that your air conditioner is running efficiently, which can save you money on your energy bill. Here are a few tips to help you maintain your RV air conditioner:
Regular Cleaning and Maintenance Tips
One of the most important things you can do to keep your RV air conditioner running smoothly is to clean and maintain it regularly. Here are a few tips:
- Check and clean the air filters regularly. Dirty air filters can restrict airflow and reduce the efficiency of your air conditioner. Depending on how often you use your RV, you may need to clean or replace your air filters every few weeks.
- Clean the coils and condenser fins annually. Over time, dirt and debris can accumulate on the coils and fins, reducing the efficiency of your air conditioner. To clean them, use a soft brush or vacuum to remove any dirt or debris.
- Keep the area around your air conditioner clean and free of debris. Leaves, branches, and other debris can clog your air conditioner’s vents and reduce airflow, which can cause your air conditioner to work harder than it needs to.
Preventing Common Issues
Prevent common air conditioner issues by keeping up with regular maintenance, storing your RV in a shaded area, and avoiding overuse of your air conditioner. Here are a few additional tips:
- Store your RV in a shaded area whenever possible. Direct sunlight can cause your air conditioner to work harder than it needs to, which can lead to premature wear and tear.
- Avoid overusing your air conditioner. While it may be tempting to keep your RV cool all day long, overuse can cause your air conditioner to wear out faster. Instead, try to use your air conditioner only when you need it, and turn it off when you’re not in your RV.
- Have your air conditioner serviced by a professional at least once a year. A professional can inspect your air conditioner for any potential issues and perform any necessary repairs or maintenance.
By following these tips, you can help ensure that your RV air conditioner stays in good working condition for years to come. Not only will this save you money on repairs and energy costs, but it will also help you stay comfortable during your travels.
Conclusion
Resetting your RV air conditioner isn’t as complicated as it may seem. By following these simple steps and taking appropriate safety measures, you can quickly reset your air conditioner and keep it working correctly. Don’t forget to keep up with regular maintenance to prevent future issues and keep your RV cool all summer long!

