If you’re an RV owner, you know how important it is to have access to clean water while on the road. However, sometimes the water pump can lose its prime, resulting in little to no water flow. Fear not, as priming your RV water pump is a relatively simple process that you can complete with just a few tools. In this guide, we’ll cover everything you need to know to prime your RV water pump and get your water flowing again.
Table of Contents
Understanding the Importance of Priming an RV Water Pump
Before we dive into the priming process, let’s take a moment to understand why priming is necessary. Simply put, priming ensures that the water pump has water in it before it starts working. Without water in the pump, it will struggle to generate the pressure necessary to move water through the RV’s plumbing system. This can lead to low or no water flow, which is obviously less than ideal when you are on the road.
When you’re out on the road, you rely on your RV’s water system for everything from showering to cooking. Without a properly functioning water pump, you could find yourself in a difficult situation. That’s why it’s important to understand the importance of priming your RV water pump.
What is Priming?
Priming is the process of removing air from the water pump system and filling it with water, ensuring that the pump has the water it needs to function properly. Essentially, it’s like “prepping” the pump before you turn it on.
Priming can be done manually or automatically. Some RV water pumps have an automatic priming feature, which means they will automatically fill with water when they are turned on. However, if your RV water pump does not have an automatic priming feature, you will need to manually prime it.
Why is Priming Necessary?
Priming is necessary because RV water pumps are not self-priming. This means that they cannot generate the suction necessary to pull water into the pump on their own. Without water in the pump, it will struggle to generate the pressure needed to move water through the RV’s plumbing system. This can lead to low or no water flow.
Without proper water flow, you won’t be able to take a shower, wash dishes, or even use the toilet. That’s why it’s so important to make sure your RV water pump is properly primed before you hit the road.
Signs Your RV Water Pump Needs Priming
There are a few signs that your RV water pump may need priming. These include low or no water pressure, sputtering water flow, or a pump that runs but does not generate water flow. If you notice any of these signs, it’s time to prime your RV water pump.
It’s a good idea to check your RV water pump regularly to make sure it’s working properly. This will help you avoid any unexpected issues while you’re on the road. If you’re not sure how to prime your RV water pump, consult your owner’s manual or contact a professional for assistance.
Tools and Materials Needed for Priming an RV Water Pump
Before you start the priming process, you’ll need to gather a few tools and materials. Here’s what you’ll need:
Basic Tools
- A wrench
- A screwdriver
- A bucket
- Rags
Optional Tools for Easier Priming
- A priming pump
- Extra hose
- A water filter
Safety Precautions and Protective Gear
Whenever you’re working on an RV’s water system, it’s important to take proper safety precautions. This means wearing eye protection and gloves, as well as ensuring that the RV’s power supply is shut off to prevent any electrical accidents. Additionally, make sure that the RV is parked on a level surface to prevent any accidents.
Additional Tips for Priming an RV Water Pump
Priming an RV water pump can seem like a daunting task, but with the right tools and some basic knowledge, it’s actually quite simple. Here are a few additional tips to keep in mind:
- Make sure that the water tank is full before attempting to prime the pump. This will ensure that there is enough water to flow through the system.
- Check the water pump’s manual for specific instructions on how to prime the pump. Different pumps may require different steps.
- If you’re using a priming pump, make sure that it is properly connected to the water system before starting the priming process.
- When priming the pump, be patient. It may take several minutes for the water to start flowing through the system.
Once the pump is primed, turn on the faucets in the RV to check for proper water flow and pressure. - If you notice any leaks or issues with the water system, address them immediately to prevent further damage.
By following these tips and taking the proper safety precautions, you can easily prime your RV’s water pump and ensure that your water system is working properly. Happy camping!
How to Prime an RV Water Pump?
Turning Off the RV’s Power Supply
The first thing you need to do before priming your RV water pump is turn off the RV’s power supply. This will prevent any electrical accidents while you’re working on the water pump system. Make sure to also disconnect any external power source that may be connected to your RV.
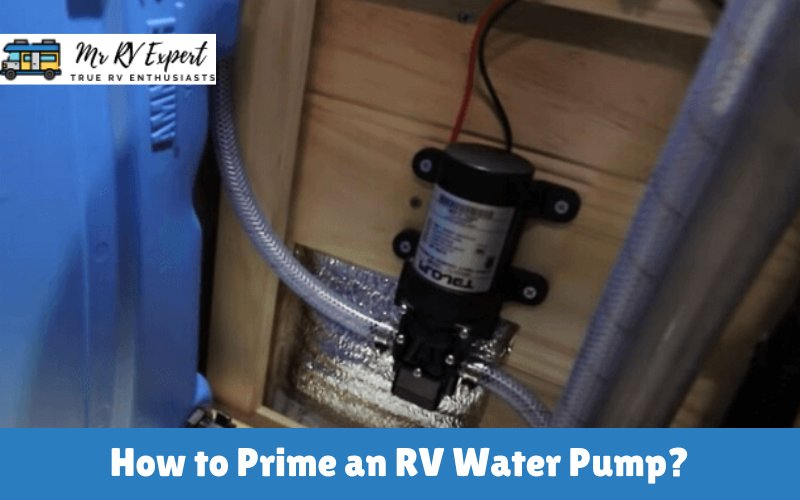
Locating the RV Water Pump
The next step is to locate the RV water pump. In most RVs, the pump is located in a storage compartment or under a bench. Refer to your RV’s manual if you’re unsure where to find it. Once you have located the water pump, make sure that there is enough space around it to work comfortably.
Draining the RV’s Water System
Before you can start priming the pump, you’ll need to drain the RV’s water system. Start by turning off the water supply to the RV and opening all of the faucets and valves to let the water drain out. This will ensure that the pump starts with a clean slate and will fill up with fresh water when you start the priming process. Make sure to also drain the hot water tank to prevent any damage to the heating element.
It is important to note that if you have antifreeze in your RV’s water system, you will need to flush it out before priming the pump. This is because antifreeze can damage the pump and also contaminate your fresh water supply.
Inspecting the Water Pump
Before priming the water pump, take a few minutes to inspect it for any signs of damage or wear and tear. Check the pump’s wiring, hoses, and fittings for any cracks or leaks. If you notice any damage, it is best to replace the parts before proceeding with the priming process.
Priming the Water Pump
Now that you have turned off the power supply, located the water pump, drained the water system, and inspected the pump, it’s time to prime it. To do this, you will need to fill the pump with water. You can use a jug or bucket to pour water into the pump until it is full. Make sure that the pump’s inlet hose is submerged in the water.
Once the pump is full of water, turn on the power supply to the RV. The pump should start running and you should hear the sound of water flowing through the system. Keep pouring water into the pump until the water coming out of the faucets and valves is clear and free of air bubbles. This means that the pump is fully primed and ready to use.
Remember to turn off the power supply to the RV and disconnect any external power source once you have finished priming the water pump. This will ensure your safety and prevent any damage to the pump or RV’s electrical system.
Step-by-Step Guide to Priming an RV Water Pump
As any seasoned RV owner knows, having a properly functioning water pump is essential for a successful trip. Without a working water pump, you won’t be able to take showers, wash dishes, or even flush the toilet. That’s why it’s important to know how to prime your RV water pump. Follow these steps to ensure that your water pump is primed and ready for action.
Step 1: Opening the Water Pump’s Inlet Valve
The first step in priming your RV water pump is to locate the water pump’s inlet valve. This valve is typically located on the side of the pump and will need to be opened before you start priming. It’s important to note that different RV water pumps may have different types of inlet valves, so make sure to consult your owner’s manual before proceeding. Once you have located the inlet valve, use your wrench or screwdriver to turn the valve counterclockwise until it is fully open. This will allow water to flow into the pump and begin the priming process.
Step 2: Filling the Water Pump with Water
Next, you will need to fill the water pump with water. Using your bucket, fill the bucket with clean, fresh water. It’s important to use clean water to avoid introducing any contaminants into your RV’s plumbing system. Then, take your hose and connect it to the water pump’s inlet valve. Make sure that the hose is securely attached to the valve to prevent any leaks. Once you have connected the hose, submerge the other end into your bucket of water. Turn on the pump and wait for it to fill up with water. This may take a few minutes, depending on the size of your pump and the amount of water in your bucket. Be patient and let the pump fill up completely. This will ensure that there is enough water in the pump to generate pressure and move water through the RV’s plumbing system.
Step 3: Closing the Inlet Valve and Turning on the Power Supply
Once the pump has filled up with water, it’s time to close the inlet valve. Using your wrench or screwdriver, turn the valve clockwise until it is closed. This will prevent any additional water from entering the pump and allow the pump to build up pressure. Next, turn on the RV’s power supply and let the pump run for a few minutes to ensure that everything is functioning properly. You should be able to hear the pump working and feel the water flowing through the plumbing system.
Step 4: Checking for Leaks and Proper Functioning
Finally, it’s time to check for leaks and proper functioning. Turn on all of the faucets in the RV and check for any leaks or sputtering water flow. If you notice anything out of the ordinary, turn off the pump and double-check your work. It’s better to catch any issues early on than to risk a plumbing disaster later on. Otherwise, your RV water pump should be primed and ready to go. With a properly primed water pump, you can enjoy all of the comforts of home while on the road.
Conclusion
Priming your RV water pump is an essential part of maintaining your RV’s water system. With the right tools and materials, you can easily complete the process in just a few steps. By following this guide, you’ll be able to prime your RV water pump with confidence and get back to enjoying clean, fresh water on the road.