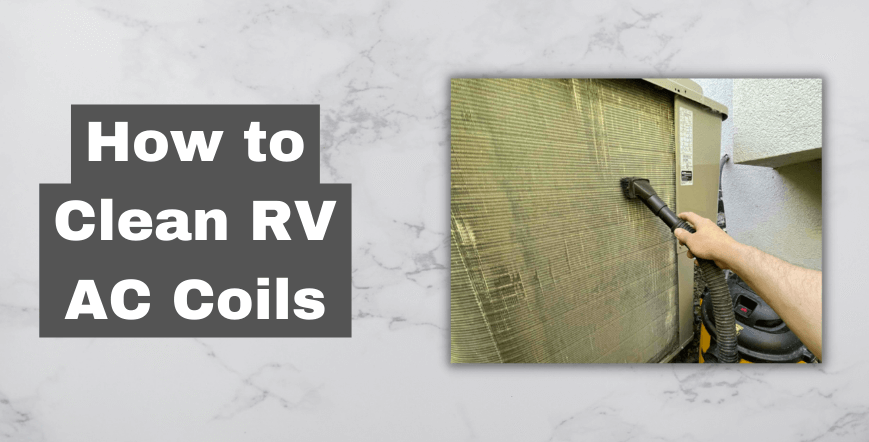
You can learn cleaning rv ac coils with this article. You can also use a garden hose with a sprayer attachment. The key is to gently spray water onto the coils without damaging them. Don’t spray water directly into the RV through the roof hole, as this can cause water damage.
Table of Contents
How to clean coils on RV ac unit?
Clean the RV ac unit’s evaporator coils annually to ensure proper airflow. Keeping the coils clean will prevent your air conditioner from freezing. The main cause of freezing is poor airflow. This can be caused by a bad flow divider. This keeps hot inlet air separate from cold outlet air.
Cleaning rv air conditioner coils is an important task that should be done frequently. Keeping the coils clean will ensure the air in your RV remains fresh. This is particularly important if you live in an area where air pollution is a problem.
The first step in cleaning the coils is to remove the plastic cover. Bees like to build nests on these plastic covers. Bees will not be able to fly away from a hive that is on the roof of your RV, so it’s best to remove the entire cover before cleaning.
Brushing the coils can help remove light deposits of dirt, but if dirt is stubborn, you may need to scrub the coils with a soft brush. Use a brush with soft bristles for this purpose; hard bristles can damage the fins. You can buy an RV air conditioner coil cleaner that contains anti-fungal components, but it’s more expensive than a basic chemical coil cleaner. After cleaning, make sure to rinse with pure water. If the coils are dirty, you can also use a shop vac.
Cleaning the coils on your RV air conditioner may sound complicated, but it’s not as difficult as you might think. You can clean your RV air conditioning unit with a small amount of detergent and a soft brush. It’s not hard work, and with a little care, it can be an enjoyable experience.
How to clean RV ac evaporator coils?
Cleaning the evaporator coils on your RV air conditioning system is an important part of proper AC maintenance. This process is easy and requires only the removal of loose debris and dust. If necessary, you can also use a rv evaporator coil cleaner. You should follow the manufacturer’s instructions, and make sure the cleaner is thoroughly rinsed from the coils.
First, remove the cover over the evaporator coils. Once you have removed the cover, you will see the coils below. Next, you can clean these coils with detergent and warm water. It can clean and remove any debris from the evaporator coils. Moreover, when working on the roof of an RV, wear protective gear and gloves so you don’t get hurt while you clean.
Once you have cleaned the evaporator coils, you should rinse them thoroughly with pure water. A shop vac can help you with this process as it removes loose debris. You may need to use it if the coils are especially dirty. However, it is not always necessary.
While it may sound like a complicated process, RV air conditioning coil cleaning is actually an easy task. With the right materials and a few tips, you can clean your AC evaporator coils in your RV and enjoy cool, comfortable, and clean air.
How to clean an RV rooftop ac coils?
If you have a roof-mounted air conditioning unit, you’ll want to clean the coils regularly. You can use a chemical coil cleaner and some rags to get the job done. You’ll need to be gentle with the coils and avoid damaging the delicate fins. Ideally, you should clean the coils once a year.
If you can reach the coils from below, you can use a long vacuum attachment. Be sure to use the lowest suction setting. Once the coils are clean, oil them. Next, reinstall the shroud. Finally, replace the air filter.
You can also buy a foaming coil cleaner that has anti-fungal properties. However, it’s important to note that this cleaner costs more than the basic chemical coil cleaner. Also, be sure to only use this on the evaporator coil, which is the most exposed coil. You may have to repeat this process several times if the coils are really dirty.
You can also clean the coils with a spray-on foam, which is widely available and inexpensive. These products work by dislodging loose surface materials from the coils. Once the buildup has been removed, you can use a shop vac to collect any excess debris.
Summing up:
Regular maintenance of your RV’s air conditioning system includes cleaning the coils. This is a fairly simple process. Remove any loose debris and dust from the coils, and replace the shroud. If the coils are very dirty, it may be necessary to use a coil cleaner.
You can do this task yourself. You will need to purchase chemical coil cleaner, rags, and a soft coil brush. It doesn’t take a lot of time, but it should be done carefully. A few simple steps will keep your AC in tip-top shape. You can follow the steps outlined in the RV Owner’s Guide to Basic RV Maintenance. After purchasing the cleaning solution, you can spray the cleaning solution on the coils using a garden sprayer or a hand sprayer. This will loosen up any dirt or debris on the coils. Repeat as necessary until the coils are thoroughly clean.