If you’re planning a camping trip or living on the road in your RV, chances are you’ll need to do some cooking. And while most RVs come equipped with a kitchen area, lighting the oven can be a bit tricky if you’re unfamiliar with the process. Fortunately, with the right tools and knowledge, lighting an RV oven is a straightforward process that anyone can do.
Table of Contents
Understanding Your RV Oven
The RV oven is an essential appliance for anyone who loves to travel and cook. Whether you’re making a quick breakfast or a full-course dinner, the RV oven can help you prepare delicious meals on the go. However, before you start cooking, it’s important to understand the type of oven you have and the safety precautions you need to take.
Types of RV Ovens
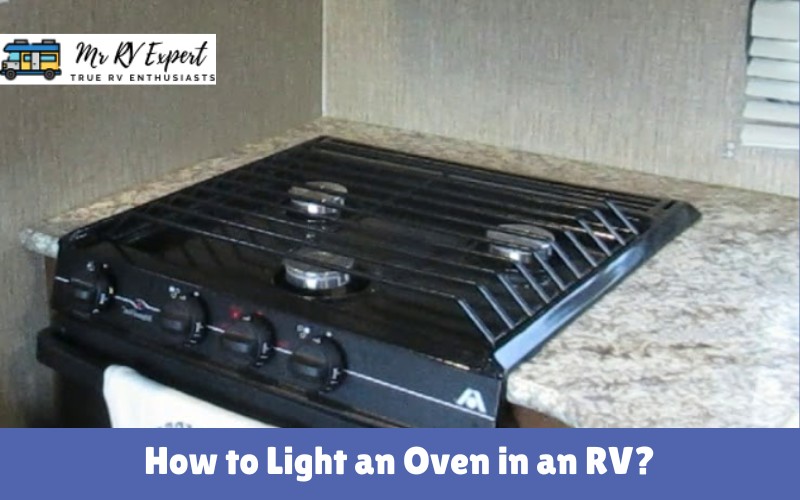
RV ovens typically come in two types: propane and electric. Propane ovens require a supply of propane gas, which is stored in tanks that are connected to the RV’s plumbing system. This makes them ideal for off-grid camping, as they don’t require an electrical hookup. However, propane ovens can be more challenging to light and maintain than electric ovens.
Propane ovens use a pilot light to ignite the gas and heat the oven. Some newer models may use an electronic ignition system instead. Electric ovens, on the other hand, are powered by the RV’s electrical system. They work much like a traditional oven, with an electric heating element that heats the oven from the bottom or top. Electric ovens are generally easier to use and maintain than propane ovens, but they require an electrical hookup to function.
Safety Precautions for RV Ovens
Before attempting to light your RV oven, it’s important to take some safety precautions. You should always make sure that the oven area is well-ventilated to prevent gas buildup. This is especially important if you have a propane oven, as propane gas is heavier than air and can accumulate in low-lying areas.
It’s also a good idea to check for gas leaks regularly. You can do this by using a gas leak detector or by applying a solution of water and dish soap to the gas connections and looking for bubbles. If you detect a gas leak, turn off the gas supply immediately and open all windows and doors to ventilate the area. Do not use any electrical appliances or light switches, as they can create a spark and ignite the gas.
Finally, it’s important to keep a fire extinguisher handy in case of emergencies. Make sure that everyone in your RV knows how to use the fire extinguisher and where it is located. You should also have a plan for evacuating the RV in case of a fire.
By understanding the type of oven you have and taking the necessary safety precautions, you can enjoy delicious meals on the go with your RV oven.
Gathering the Necessary Tools and Materials
Before you start to light your RV oven, you’ll need to gather the necessary tools and materials. However, before we dive into the details, let’s take a moment to appreciate the beauty of cooking in an RV. Cooking in an RV can be a unique and enjoyable experience, especially if you’re on a road trip with your loved ones. It’s a great way to bond over a delicious meal while enjoying the scenic views.
Now, back to the topic at hand. To light your RV oven safely, you’ll need an oven lighter or long matches, oven mitts, and a fire extinguisher. Let’s discuss each of these items in detail.
Oven Lighter or Long Matches
An oven lighter or long matches will be needed to light the oven’s pilot light. It’s important to note that using regular matches can be dangerous, as they can burn your fingers or break while lighting the pilot light. Therefore, it’s recommended to use long matches or an oven lighter. Check that your lighter or matches are working before you start so that you don’t get caught out halfway through the process.
Oven Mitts
Oven mitts are an essential item when using any oven and are particularly important when using an RV oven. The confined space can make it difficult to manoeuvre, so the extra protection provided by oven mitts is essential. When choosing oven mitts, make sure that they are made from heat-resistant material, such as silicone or leather, to protect your hands while handling hot pots and pans. Additionally, it’s recommended to have two pairs of oven mitts, in case one pair gets dirty or wet.
Fire Extinguisher
It’s important to always have a fire extinguisher within reach, in case anything goes wrong. Make sure that you understand how to use the fire extinguisher before you start cooking. It’s also recommended to have a smoke detector and a carbon monoxide detector installed in your RV, to ensure your safety while cooking.
Now that you have gathered all the necessary tools and materials, it’s time to light your RV oven and start cooking a delicious meal. Bon appétit!
Preparing Your RV Oven for Lighting
Before lighting your RV oven, there are a few steps you need to take to ensure that it’s safe to use.
Cooking in an RV can be a fun and convenient way to enjoy your favourite meals on the road. However, it’s important to take the necessary precautions to ensure that your cooking experience is not only enjoyable but also safe. Here are some additional tips to keep in mind when preparing your RV oven for lighting:
Ensuring Proper Ventilation
Proper ventilation is essential when using an RV oven. Not only does it help to prevent the build-up of gas, but it also helps to regulate the temperature inside your RV. Make sure to open the windows and vents in your RV to allow for fresh air to circulate. This will help to prevent the build-up of gas and prevent any potential accidents.
If you’re cooking inside your RV, it’s also a good idea to turn on the range hood fan to help remove any smoke or cooking odours.
Checking for Gas Leaks
Before lighting your oven, you want to make sure that there are no gas leaks. This is important because gas leaks can be dangerous and even deadly. You can do this by using a gas leak detector or by turning on the gas supply and checking for the smell of gas. If you detect any gas, turn off the gas supply and contact a professional to fix the leak before attempting to cook.
It’s also a good idea to check the gas connections and hoses for any signs of wear or damage. If you notice any issues, it’s best to replace them before using your oven.
Cleaning the Oven and Burners
It’s important to keep your oven and burners clean to prevent the build-up of grease and debris, which can lead to fires. Use a non-abrasive cleaner and a soft cloth to wipe down the inside of the oven and the burners before each use.
You should also clean the oven racks and trays regularly to prevent any food residue from building up. This will not only help to prevent fires but also ensure that your food tastes great.
By following these tips, you can ensure that your RV oven is safe and ready to use. Happy cooking!
Lighting the RV Oven: Step-by-Step Instructions
Now that you’ve gathered your tools and materials and prepared your oven, it’s time to light it. But before we dive into the steps, let’s talk about why it’s important to know how to light your RV oven.
When you’re out on the road, you never know when you’ll need to cook a hot meal. And while many RVs come equipped with microwaves or stovetops, there’s something special about cooking in an oven. Whether you’re making a batch of cookies, a casserole, or a roast, having a functioning oven can make all the difference.
Step 1: Open the Oven Door and Locate the Pilot Light
The first step in lighting your RV oven is to open the oven door and locate the pilot light. This may be located at the back of the oven or the side. Consult your RV owner’s manual if you’re unsure. It’s important to know where the pilot light is located so you can safely and easily light it.
Step 2: Turn on the Gas Supply
Next, turn on the gas supply. This will allow gas to flow to the pilot light and burners. You should hear a gas hissing sound when the supply is turned on. It’s important to make sure the gas supply is turned on before attempting to light the pilot light. Without gas, the oven won’t heat up.
Step 3: Ignite the Pilot Light
Now, it’s time to light the pilot light. If you have an oven lighter, use it to light the pilot light. Otherwise, use a long match. Hold the flame to the pilot light until it ignites. You may need to hold the flame for 30 seconds or so to ensure that the pilot light stays lit. If the pilot light doesn’t stay lit, you may need to repeat this step a few times.
Step 4: Adjust the Oven Temperature
Once the pilot light is lit, you can adjust the oven temperature. You should see a knob or dial on the outside of the oven that allows you to adjust the temperature. Turn the knob to the desired temperature and wait for the oven to heat up. It’s important to note that RV ovens may take longer to heat up than traditional ovens, so be patient.
Step 5: Monitor the Oven While in Use
Finally, it’s important to monitor the oven while it’s in use and to take any necessary safety precautions. Keep a close eye on your food and use oven mitts to handle hot pans or dishes. And most importantly, never leave your oven unattended while it’s in use. Not only is this a safety hazard, but it can also lead to overcooked or burnt food.
Now that you know how to light your RV oven, you can enjoy all the delicious meals you can cook in it. From baked goods to casseroles to roasts, the possibilities are endless. Just remember to always follow these steps and take the necessary safety precautions to ensure a successful and enjoyable cooking experience.
Conclusion
Lighting an RV oven may seem intimidating at first, but with the right knowledge and tools, it’s a simple process that anyone can do. By following these step-by-step instructions, you can ensure that you have a safe and successful cooking experience in your RV.

