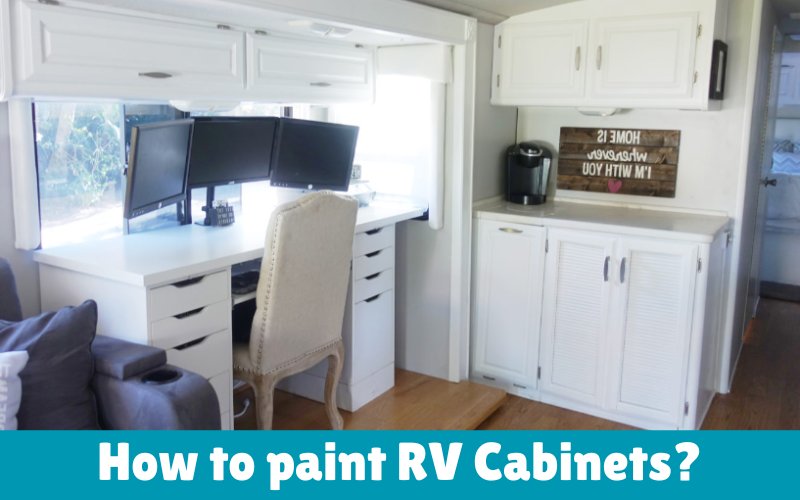
Revamping your RV’s cabinets with a fresh coat of paint can be a fantastic way to give your mobile home a new vibe. Though it may appear daunting, with the appropriate steps, this task can be accomplished without breaking the bank. In this write-up, we’ll take you through how to paint RV cabinets step-by-step.
Table of Contents
Gather materials:
- Sandpaper or sander (depending on your budget)
- Tarp or drop cloth (newspaper can be a cheaper alternative)
- Screwdriver or drill (depending on your budget)
- Primer
- Paint (see below for the type of paint required)
- Painter’s tape
- A set of paintbrushes in different sizes
- Roller and tray for painting larger surfaces
- Small step stool or ladder, depending on the height of your cabinets
Choosing the Right Paint for Your RV Cabinets
Before embarking on your cabinet-painting project, knowing the different types of RV paints available is important to make an informed decision. Here are the three distinct varieties of RV paints:
Water-Based Paints
The most common type of RV paint is a water-based paint. These paints are easy to apply, clean up, and have a low odour, making them ideal for confined spaces. They are also more environmentally friendly compared to other paint types.
Acrylic Latex-Paints
Acrylic latex paints share many characteristics with water-based paints but provide a more durable finish. They are also more resistant to fading and chalking, making them a great choice for RVs exposed to extreme weather conditions.
Enamel Paints
Enamel paints are the most durable type of RV painting. They offer a high-gloss finish that can last for years, even in harsh weather conditions. However, they can be more challenging and require specific application techniques to ensure an even finish.
Tips for Choosing RV Cabinet Paint Colors
Always consider the amount of natural light in your space when choosing the perfect paint colour for your RV cabinets. Opting for lighter colours is recommended if the space doesn’t receive much natural light, as this can help prevent it from feeling too dark and enclosed. Once you’ve considered lighting, it’s time to explore different paint colour options. Here are some popular RV cabinet colour ideas to inspire your selection:
- White:A classic choice that can create a clean and fresh ambiance in your RV.
- Gray:A versatile neutral option that can complement any style, whether modern or rustic.
- Brown:Opting for brown cabinets can create a cozy and inviting atmosphere in your RV, especially when paired with warm accent colours.
- Black:For those seeking a more sophisticated and refined look, black cabinets can add a touch of elegance to your RV’s interior.
How to paint RV cabinets
Prepare the Work Area
Before painting, prepare the work area to ensure a successful outcome. Begin by choosing a well-ventilated area to work in, preferably outdoors. If working indoors, open all windows and doors to improve ventilation. It’s also recommended to wear a mask if you’re sensitive to chemicals.
Lay down a drop cloth or tarp to protect the floor from paint drips and spills. It will save you the hassle of removing paint from surfaces where it shouldn’t be.
Remove the Hardware
Remove all the hardware from the cabinets, including handles, knobs, and hinges. This step will make it easier to paint the cabinets and ensure a clean and polished finish. Label each piece of hardware to avoid confusion when it’s time to reassemble everything.
Use a putty knife to fill in any holes or gaps the hardware leaves. It will create a smooth surface for painting and prevent paint from getting into areas where it shouldn’t be.
Clean the Cabinets
Once the hardware is removed, it’s time to clean the cabinets. This step is important to ensure the paint adheres to the surface. Use soap and water, Pine-Sol, vinegar with water, or baking soda with water to remove any dirt, grease, or grime on the cabinets. Rinse the cabinets with clean water and let them dry completely.
Sand the Cabinets
Sanding the cabinets is an important step that helps create a smooth surface for the paint to adhere to. Use sandpaper or an electric sander for sanding the cabinets. The choice will depend on your budget, the paint you want to remove, and how much time you want to save.
Apply paint to the Cabinets
Before applying the paint, it’s important to note that if the cabinets are particularly old or damaged, you may want to use a primer before painting. It will help the paint adhere better and provide a smoother finish.
Now that you’ve prepped the cabinets, it’s time to paint! Begin by painting the inside of the cabinets first, and then work your way outwards towards the doors and frames. Use even strokes and apply the paint in thin layers, as it’s better to do multiple coats of paint than to get everything covered in one go. It will ensure a better finish and a longer-lasting result. Be patient and let each coat dry completely before applying the next.
Reinstall the Hardware
Once the cabinets are dry, it’s time to reattach all of the hardware. If you label each piece before removing it, this should save you time when it’s time to put everything back together. Reinstall the handles, knobs, and hinges, and test each to ensure they’re secure and functioning properly.
Enjoy Your Updated RV Cabinets
After following all the previous steps, you can now sit back and enjoy your newly updated RV cabinets. Painting your RV cabinets can be time-consuming, but the result is worth it. Your RV will look and feel brand new. Take a moment to appreciate your hard work and the transformation you have created. Now is the perfect time to step back and see if there are any other updates you would like to make to your RV to further enhance its appearance.
Updating your RV cabinets makes a big difference in your RV’s overall appearance and functionality. Not only will it look better, but it will also add value if you plan on selling it in the future.
Summing up:
Painting your RV cabinets is a great way to update the look of your RV without spending a lot of money. Following the above steps, you can easily paint your cabinets and give your RV a fresh look. Remember to prepare the area, remove the hardware, clean the cabinets, sand them, prime them if necessary, paint in thin layers, and reattach the hardware. With a little effort, you can transform your RV cabinets and create a new and personalized space.