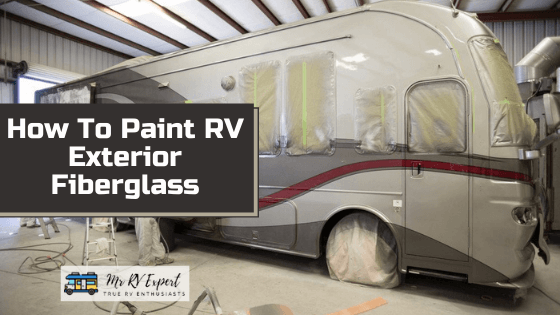
RV is a huge investment you made in your life, and you cannot make it again and again. The manufacturing of the RV vehicle remains the same, but the color and fashion changed. It is impossible to buy a new RV vehicle just because of changing trends and styles. The most factors are the performance and comfort of the vehicle. But for many people, the look of the product is everything. There may be another reason you don’t like your vehicle’s new color, so it doesn’t mean that you have to buy a new RV vehicle. You can change the color on your own so, if you thinking about how to paint RV exterior fiberglass then you can follow our simple instructions to make your RV look brand new.
Table of Contents
Preparations For Painting
Anything you are going to do required some preparations. As well as RV needs some preparations before applying paints. So, first of all, find a shady area to park the RV in the right place. Then collect the necessary items included sandpaper, gloves, soap, sponge and detergent, painter tape, etc.
1) Cleaning Before Paint
To ensure optimal results, it is crucial to consider the following steps. Begin by removing dust from the exterior of the object. Employ a sponge and soapy water for this purpose. Start by applying the soapy water to the entire surface, then proceed to utilize the sponge to thoroughly cleanse any accumulated dust and blemishes. Subsequently, rinse the exterior with fresh water. For a comprehensive cleaning, microfiber towels can be employed to diligently wipe the exterior. Over the course of several years, the roof of the recreational vehicle (RV) may accumulate dust and germs. Allocating a few hours of your time will be necessary to complete the cleaning process.
2) Roughen The Surface
Roughening up is an essential step to follow for optimal results. Sandpaper is utilized for coating and priming application. This step doesn’t require excessive time investment, as a single coat is sufficient to achieve satisfactory results. Typically, it takes only around one hour to complete. The primary objective of using sandpaper is to enhance the smoothness and cleanliness of the exterior surface.
3) Wiping The Surface
After sanding, it is recommended to wipe the surface with Denatured Alcohol using a clean cloth to effectively remove any residue. Denatured Alcohol ensures thorough cleaning, leaving no grease behind. While there are legal alternatives available, Denatured Alcohol is highly recommended for superior results.
3) Painting Tape
This step is crucial to consider. There are various areas of the RV where applying paint is not suitable. Therefore, before starting the painting process, it is essential to use tape on these specific parts. Common examples of such parts include doorknobs, tire rims, and other small fixtures. Additionally, windows and headlights do not require painting. Thus, it is important to carefully cover the windows and headlights with tape.
4) Primer
Applying a primer is an essential step that should not be overlooked. Many people mistakenly believe that using a primer is unnecessary, but doing so would be a mistake. Primers have the ability to address small cracks and fill pores, allowing the paint to adhere more effectively and efficiently to the surface.
Furthermore, using a primer can significantly extend the lifespan of the paint. When selecting a primer, consider options from reputable brands such as latex, epoxy, or polyurethane. For optimal results, it is recommended to choose paint from the same brand as the primer.
After applying the primer, it is crucial to exercise patience and allow the exterior to fully dry. This process typically takes a few hours. By following these steps and using a primer, you can ensure that the paint will adhere properly and provide long-lasting results.
Must follow the instructions of the primer brand you choose before applying.
How To Paint RV Exterior Fiberglass
After completing the preparations, now it’s time to apply proper paint on the surface. But there are many other parts to follow before applying.
1) Process of Painting
To achieve optimal results, start by thoroughly cleaning the entire exterior and completing any necessary groundwork. Next, it is important to select an appropriate location for parking your RV, such as an area with shade or adequate lighting. Avoid direct sunlight when painting the RV.
When it comes to painting, there are two options available: using a paintbrush or a painting gun. Both methods have their advantages. The paintbrush offers a more comfortable and leisurely process, albeit slower. On the other hand, the painting gun provides a faster and smoother application, but it requires proper technique to handle effectively. Be cautious not to soil your clothes if you are unfamiliar with using a painting gun.
2) Start The Paint
To begin painting the RV, start from the front side and take care to avoid any dripping. Using high-speed painting guns can increase the risk of paint dripping, so exercise caution when applying the paint to prevent this issue. Once you have finished painting the entire exterior, allow sufficient time for the paint to dry completely. Keep in mind that the color coat will take longer to dry compared to the primer. It is recommended to wait at least twenty-four hours. After the paint has dried, assess whether your RV requires an additional coat of paint or not.
3) Waxing The Paint
Once the paint has dried, the next important step is to apply wax to the exterior. Waxing serves as a crucial protective measure for the paint. Exposure to sunlight and various outdoor elements, including adverse weather conditions, can damage the paint. To ensure long-lasting protection, waxing is an excellent option. To prevent wax from getting on unwanted areas, utilize a sheet of paper to cover those sections. The application process is quick and straightforward, requiring minimal effort. Begin by taking a towel and applying wax to it, then proceed to cover the entire surface with the wax. It is recommended to perform this process slowly and deliberately. Opting for a wax in polish form can simplify the application.
Conclusion
Painting an RV’s exterior can protect it from the damaging effects of sunlight, heavy rain, fog, and other adverse weather conditions. However, purchasing a new RV can be quite expensive. If you’re looking to give your older motorhome a fresh look, painting the RV exterior fiberglass yourself can be a cost-effective solution. Changing the color is also possible with this approach. If you’re unsure about how to paint RV exterior fiberglass, don’t worry! This guide will provide you with simple and easy-to-follow steps to do it yourself. We have designed this guide to offer comprehensive information on applying paint to an RV in the most efficient manner possible, catering to your needs.
[kkstarratings]